We recommend having your carburetor checked and cleaned annually to maximize the life of your mower.
Just like the engine in a car, the small engine that is found in a self-propelled lawn mower, a push mower, or a riding lawn mower requires a carburetor in order for it to perform properly. The carburetor of the lawn mower works to achieve the most efficient possible combustion by regulating the flow of fuel and air into the engine cylinder.
If you are using stale gasoline or fuel that has been polluted, the carburetor might become clogged. Because of this residue, there may be a blockage or restriction that prevents the correct proportion of fuel and air from reaching the engine cylinder. When this takes place, it is referred to as “dirty” the carburetor.
Signs of Dirty Carburetor
After a protracted winter season, it is not uncommon for homeowners to have the problem that the engine of their lawn mower will not start when they wish to mow their grass.
Because this may be an indication that the carburetor in your mower is clogged or even rusted, it is essential to perform annual maintenance at the beginning of the mowing season in order to resolve any issues that may have arisen as a result of the mower having been inactive for an extended period of time.
Other signs of a dirty or limited carburetor include black smoke coming from the muffler, a significant increase in the amount of gasoline that is used, or an engine that operates roughly while it is being used. In the following paragraphs, you will learn not only how to clean the carburetor of a lawn mower but also how to decide if you need a lawn mower carburetor cleaner or more thorough carburetor repair.
It is not too difficult to diagnose a carburetor that is either clogged or dirty.
- It is tough to start the engine on the lawn mower.
- The engine starts while you are mowing the grass, but it does not continue.
- The engine makes a lot of noise when I’m mowing.
- It has been noted that the muffler is giving out a smoky black exhaust.
- Using a lawn mower in the typical manner causes a discernible increase in the amount of fuel used.
To avoid causing the carburetor to get clogged, you should always fill the tank with fresh gasoline and add a fuel stabilizer at the same time. Both of these steps will assist to maintain the fuel’s purity. If the carburetor does get clogged, cleaning the component is something you should give some thought to doing.
Before You Start…
Prepare tools and necessary items: screwdriver, needle-nose pliers, nut driver, socket set, gloves, carburetor cleaner product, 2 gal bucket, compressed air.
Take your wife to her parents’ house so she doesn’t get caught if something goes wrong and you get angry.
Tell your wife to film all your work on your phone, so you can upload the whole cleaning procedure to YouTube and read the complimentary comments.
Cleaning a Lawn Mower Carburetor: Step-by-Step Procedure
1. Clean outside before open
Learn how to clean a lawn mower carburetor by beginning with the outside of the engine while it is turned off and removing any dirt and debris that may be the cause of the engine running roughly. Next, go on to the carburetor and follow the steps outlined above to clean it. During the disassembly process, the inner workings of the carburetor will be exposed to a decreased degree of risk of contamination.
In order to avoid losing any little components, it is essential to maintain order in your workplace and provide adequate lighting. Make sure that your workspace is set up in a way that will allow you to simply remove the components of the carburetor, clean them, do any required repairs, and then replace them.
2. Disconnect the parts that prevent the carburetor from being removed
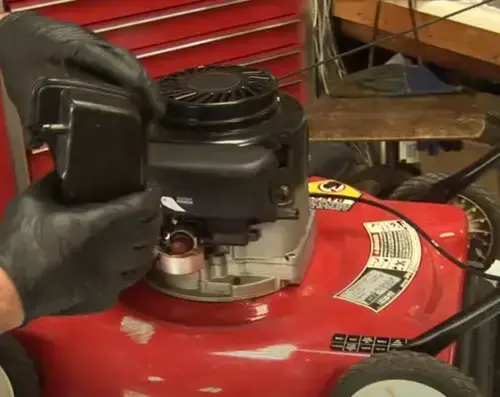
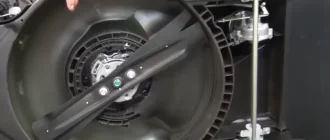
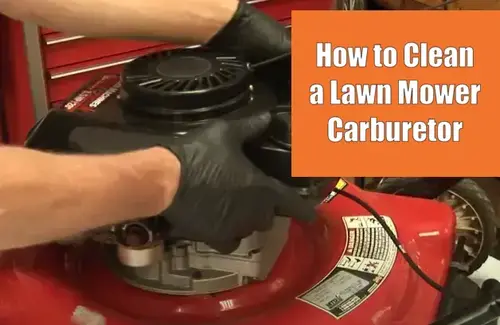
To obtain access to the carburetor on your lawn mower, you will first need to remove the air filter housing.
The carburetor is typically situated on top of the air filter in most vehicles. Determine whether the air filter is secured in place by clips or screws, and if it is, use the appropriate tool to remove the clips or screws. If the air filter is secured in place by either clips or screws, remove them.
To proceed, remove the air filter from the device. A soiled or worn-out air filter has to be inspected, and the appropriate action needs to be taken. In the event that you have any difficulties doing so, the user handbook that came with your lawnmower should provide you with detailed instructions on how to remove the air filter.
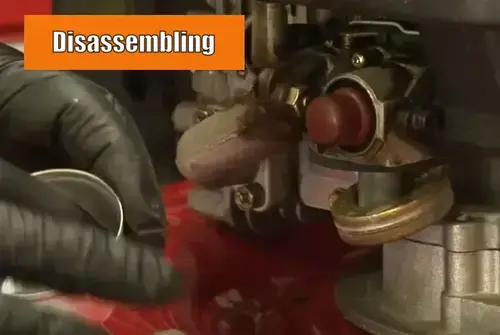
3. Remove and disassemble carburetor
While protecting your hands with durable gloves, use a spray cleaner to either wipe the exterior of the carburetor on the lawn mower or spray it into the throat of the component. However, in order to disassemble and clean the carburetor, the engine must be stopped and the carburetor must be removed completely.
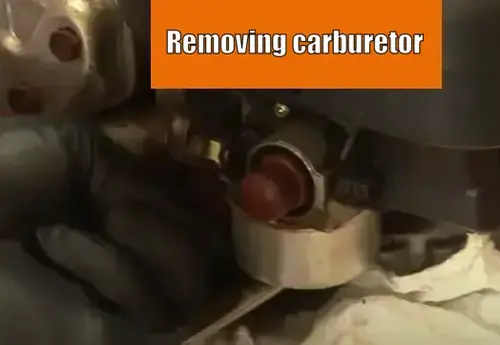
After you have used a nut driver or socket set to loosen the two nuts that are securing the carburetor to the engine, you will be able to disconnect the wires that are attached to the throttle and the choke linkage.
Take care to remember where you stashed any screws, nuts, or other small components, and make a mental note (or take a photo) of where you positioned any cables or hoses so that you may return them to their original locations.
Be sure to have a catch container ready before using needle-nose pliers to detach the gasoline lines from the nipples of the carburetor housing. Disconnecting the lines will release fuel into the surrounding area. If there is no gas flowing out of the fuel line, either the fuel line or the fuel filter is blocked. Either one of these components has to be cleaned before the lawn mower can be put back together.
After disengaging the carburetor, remove it from the engine while taking care not to damage the main gasket that seals the connection between the two components. In addition, make sure to recall where the carburetor was originally fitted so that you don’t end up reinstalling it in the incorrect location. Putting the fuel for the carburetor into a bucket beforehand will make it easier to empty it.
Before you begin disassembling your carburetor, it is essential to bear in mind that every element must be placed back in the location from which it was originally removed. In the event that you haven’t done so before, prepare a workspace in which you won’t be interrupted while you disassemble the carburetor.
Taking images of the procedure can assist you in remembering how the pieces should be reassembled after it is complete.
You should put on gloves and place the carburetor in the middle of a clean work area before beginning disassembly. To start, clean the region around the bowl while the carburetor is in place. After that, take the bolt off of the fuel bowl and use a paper clip or a fine wire to look into the hole of the nut to see if there is any debris in there.
It is necessary to remove the float and hinge pin from the carburetor. Additionally, the needle, if it is necessary, must be removed and changed. Under no circumstances may any of the components be separated.
4. Check for warn parts and replace if required
Worn parts cannot be restored by even the most thorough carburetor cleaning. When the float, pin, needle, or gaskets on your carburetor show significant signs of wear, it’s time to get a carburetor repair kit made just for your model.
The gaskets in the carburetor tend to wear out sooner than other parts. When preparing for your annual carburetor cleaning, it is strongly recommended that you have any necessary replacement components on hand. In this way, you won’t have to disassemble the carburetor more than necessary.
Changing the air filter and mower blades at the same time helps to streamline the servicing process.
5. Clean. Clean. Clean
Disassemble the carburetor while wearing protective gloves so that you may clean the components by spraying cleaner inside the housing and disassembling the carburetor. Carburetor cleaner is also available in the form of bottles and jugs, but using an aerosol can to clean your carburetor is the most practical and time-efficient option.
If you would prefer use a liquid carburetor cleaner instead of a spray cleaner, you will need to pour the cleaner into a bucket so that the components may soak in it. This is necessary in order to utilize the liquid cleaner. The primary components of the carburetor should be wired together, and then placed carefully in a bucket containing carb cleaner. Before putting the little carburetor parts into the bucket, wrap them in aluminum screen or place them in a basket with a fine-mesh netting. It is recommended that you leave the pieces to soak for at least an hour if you want to ensure that they are completely clean.
6. Reassemble the carburetor
To properly clean the components of the carburetor, you must first rinse them with water to remove any trace of carburetor cleaner that may have been left behind. The components may then be dried by either being exposed to air or being blasted with compressed air in a blow dryer. Make certain that each of the components is completely dry before reassembling it.
After you have established that each of the components has been adequately dried, you may start to partially reassemble the carburetor. In order to ensure that everything is reassembled in the correct manner, it is important that you review the photographs that you took before you began disassembling items.
After reassembling the carburetor and putting it on the lawn mower, you will need to reattach the fuel lines to the fuel tank and reinstall the gasoline lines. Replace the air filter on the lawnmower and ensure that all of the carburetor bolts are securely fastened.
If there are any extra parts, do not rush to throw them away )))
Done. What to Do Next?
It is important to test the lawn mower right away after repairing/cleaning the carburetor. If something goes wrong, you can fix it right away. It’s easier and faster.
Don’t forget that timely cleaning, repair and maintenance prolongs the life of not only lawn mowers, but of any equipment as well.
See also: Lawn Mower Repair Services