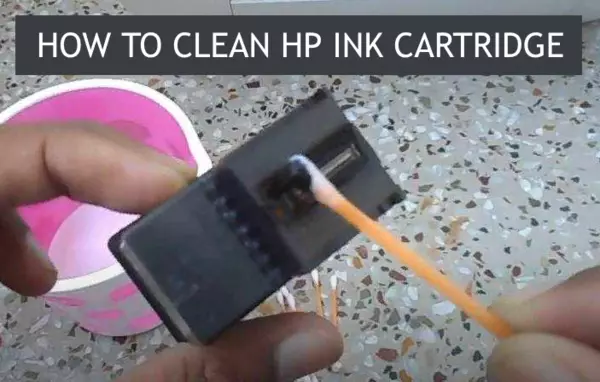
HP printer cartridge cleaning is a standard procedure for owners of HP printers who print a lot. We will teach you how to do it correctly.
If you frequently print files for your business, you’ll need to perform frequent maintenance to keep your hard copies sharp and clear. With time, dried ink and dust can obstruct the ink nozzles and cause streaks or blank areas on the paper.
HP Deskjet printers have a built-in procedure that cleans up dried ink from inside the cartridges, which may remove missing out on lines or dots on your printouts. If you see ink streaks after printing, you’ll need to manually clean the cartridges to get rid of any external debris.
Manual Cleaning of HP Deskjet Cartridge
- Turn on the HP Deskjet printer and raise the cover. When the ink cartridges move to the center of the printer, unplug the power cord and raise the cartridges out of the printer.
- Set the ink cartridges large side down on a notepad. Moisten cotton bud with water and squeeze out any excess water. Tidy the edges around the nozzle plates on the bottom of the ink cartridges. Do not touch the nozzle plates or copper contacts with the cotton bud.
- Clean the ink cartridge cradle inside the printer with clean, moist cotton swabs. Allow the ink cartridges and cradle to dry before changing the cartridges. Close the printer cover and plug in the power cord.
- Print a test page to ensure that the cartridges were re-installed correctly.
HP Printer Cartridge Automatic Cleaning
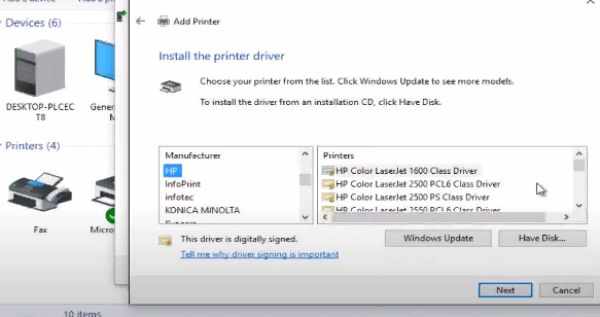
- Click Start and “All Programs.” Find the HP Deskjet printer in the list and click it to open the printer menu. Additionally, you can click the HP Deskjet icon on your desktop or in the job bar.
- Click the “Printer Services” tab and then click “Clean the Print Cartridges.” Click “Clean” to clean the printer and print a test sheet.
- Examine the test sheet and click “Done” if the print quality is good. If not, click “Intermediate Clean” to perform a much deeper clean. If the print quality is good, click “Done” and then click “Prime.” Take a look at the last test sheet and click “Done.” If the print quality is bad after the intermediate cleaning, you might need to replace the ink cartridges.
How to Manually Clean an HP Printhead
Before we continue, you need to understand that some HP inkjet printers include a built-in printhead different from the ink cartridges, and there are also some HP inkjet printers with printheads constructed into the private ink cartridges.
Cleaning Printheads Built Into Printer
By hand cleaning a printhead that is integrated in to your printer takes a bit more work. The actions below are for HP printers that have a detachable printhead, like the HP OfficeJet 8710. You can also utilizes this technique on non-HP printers with printheads constructed into the printer.
Required supplies: a plastic container, a couple of dry paper towels, a lint-free fabric and filtered or distilled warm water.
- Fold the dry paper towel into quarters and place it in the plastic container
- Pour about 2 inches of warm water on top of the paper towel so that it is completely immersed
- Open up the printer and remove all of the ink cartridges from the machine
- Set the cartridges aside on a separate paper towel while you continue the printhead cleaning process. Make certain the cartridges are facing up on the paper towel.
- Lift up on the gray lock behind the cartridge carriage that holds the cartridges. This will launch the printhead from the printer.
- Pull the printhead up and out to remove it from the machine.
- Moisten the lint-free cloth with warm water.
- Gently clean away an excess ink on the printhead nozzle.
- Place the printhead in the container with the submerged paper towels. The nozzle should be facing down. Be careful not to touch the nozzle as it can be damaged easily.
- Let the printhead soak for about 10 minutes. Then remove it from the container and set it on a dry paper towel to dry for fifteen minutes. The nozzle must be dealing with up.
- Re-install the printhead back into the printer. Do not forget to secure the lock! Then re-install the cartridges and run the cleansing function on the machine once again.
How to Manually Clean Clogged Ink Cartridges
Clogged ink cartridges trigger avoiding and areas of inconsistent ink output when you print. A fully blocked cartridge print head will not print at all. This happens usually when an ink cartridge is gotten for a while and exposed to air or if the printer hasn’t been used in a couple of months. Manually clean up a blocked ink cartridge with a couple of pharmacy items and restore that tidy, crisp printing you got when you first set up the cartridge.
- Remove the stopped up ink cartridge from the printer. Utilize the proper technique for your make and model, however usually speaking simply open the cover and lift the cartridge out.
- Find the print head where the ink comes out of the cartridge and rub out any dried or crusty ink with a soft cloth.
- Moisten a soft, lint-free fabric with water and clean the print head area. If you have tough water or are worried about mineral deposits from your faucet water, use pure water. If your cartridge has a gold, silver or copper nozzle plate, attempt not to get it damp. Use a wet cotton swab to just clean up the print head. This keeps the metal nozzle plate dry.
- Put the cartridge back in the printer and print a test. If you still see banding or blank areas, run the print head cleaner energy software that came with your printer. If your print is still spotty, soak the cartridge.
- Fill a small bowl with warm water. You only need enough water to cover the print head. Printer refill website Refill Instructions suggests heating water to around 180 degrees for finest outcomes. For totally clogged cartridges, use a 50-50 solution of water and ammonia.
- Stand the ink cartridge in the warm water or water-ammonia option so the print head is immersed. If you have a cartridge with a metal plate on the bottom, utilize the water-ammonia option on a cotton bud and just clean the print head.
- Soak the ink cartridge up until the water cools off, dry it with a soft fabric and reinsert it into the printer. Run the print head cleansing utility that came with your printer, then try printing to ensure ink is streaming usually once again.
Conclusion
The methods we have described for cleaning the HP printer cartridge are quite versatile and will work with most HP printer cartridges (InkJet & DeskJet.) However, if you are not sure if you can do this, then it is better to entrust it to specialists or buy a new cartridge for your HP printer:


Read also:
- How to Delete the HP Printer Deskjet Driver
- Best All-in-One Printer for 2024
- How to Scan From Printer to Computer in Windows 10
![Laptop Battle of [year]: Lenovo vs. Dell vs. HP](https://whattdw.com/wp-content/uploads/2023/03/1-18.webp)