If your sink garbage disposal is broken, you may be wondering what the cause could be. Fortunately, there are a few common causes that you can check for before calling a plumber.
Causes
Here are some of the most common causes of a broken sink garbage disposal and how to fix them.
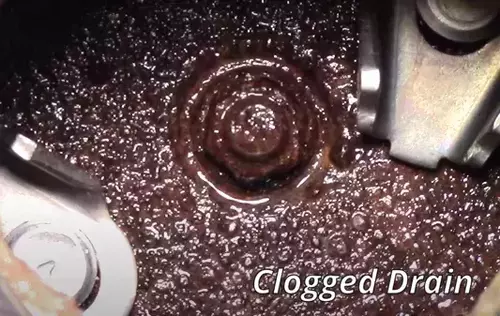
- Clogged Drain: A clogged drain is one of the most common causes of a broken sink garbage disposal. To fix this, you’ll need to unclog the drain. This can be done by using a plunger or a drain snake.
- Jammed Disposal: If your sink garbage disposal is jammed, it may be due to a foreign object that has become stuck in the blades. To fix this, you’ll need to turn off the power to the disposal and use a pair of pliers to remove the object.
- Overloaded Disposal: If your sink garbage disposal is overloaded, it may be due to too much food being put down the drain. To fix this, you’ll need to reduce the amount of food you put down the drain and run cold water while the disposal is running.
- Worn Out Motor: If your sink garbage disposal is not working, it may be due to a worn out motor. To fix this, you’ll need to replace the motor.
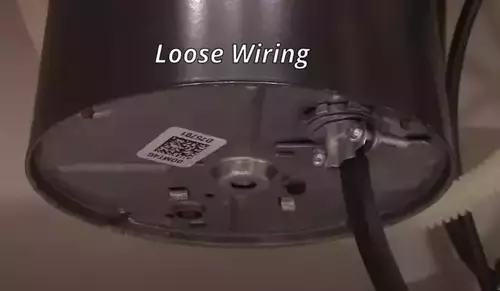
- Loose Wiring: If your sink garbage disposal is not working, it may be due to loose wiring. To fix this, you’ll need to tighten the wiring and make sure all connections are secure.
- Leaking Disposal: If your sink garbage disposal is leaking, it may be due to a cracked or broken seal. To fix this, you’ll need to replace the seal.
By following these steps, you should be able to identify and fix the cause of your broken sink garbage disposal. If you’re still having trouble, it may be best to call a professional for help.
Fixing Clogged Drain
Follow these steps to fix the clogged drain in your sink garbage disposal yourself:
Step 1: Identifying the Clog
The first step in fixing a clogged drain is to identify the source of the clog. If the clog is in the garbage disposal itself, you may be able to reach it with a pair of pliers. If the clog is further down the drain, you may need to use a plumbing snake to reach it.
Step 2: Using a Plunger
If the clog is in the garbage disposal itself, you may be able to clear it with a plunger. Make sure the plunger is completely submerged in water, then pump it up and down several times. This should help to dislodge the clog.
Step 3: Using a Plumbing Snake
If the clog is further down the drain, you may need to use a plumbing snake. Insert the snake into the drain and turn the crank handle to push the snake further down the drain. This should help to dislodge the clog.
Step 4: Using a Chemical Cleaner
If the clog is still not cleared, you may need to use a chemical cleaner. Pour the cleaner down the drain and let it sit for a few hours. This should help to break down the clog and clear the drain.
Step 5: Preventing Future Clogs
Once the clog is cleared, it is important to take steps to prevent future clogs. Make sure to run cold water for a few seconds before and after using the garbage disposal. This will help to flush out any food particles that may be stuck in the drain. Additionally, you should avoid putting fibrous foods, such as celery, down the drain.
By following these steps, you should be able to fix a clogged drain of a garbage disposal. If the clog is still not cleared, it may be time to call a professional plumber.
Fixing Jammed Disposal
Follow these steps to fix a jammed sink garbage disposal with your own hands:
Step 1: Check the Circuit Breaker
The first thing you should do is check the circuit breaker. If the breaker has been tripped, reset it and see if the disposal starts working again.
Step 2: Check the Disposal for Obstructions
If the circuit breaker is working, the next step is to check the disposal for any obstructions. Reach into the disposal with a pair of tongs and see if you can feel any objects that may be blocking the blades. If you do find something, remove it and see if the disposal starts working again.
Step 3: Use a Wrench
If the disposal still isn’t working, you may need to use a wrench to try and free up the blades. Insert the wrench into the disposal and turn it back and forth a few times. This should help to loosen any stuck objects and get the blades moving again.
Step 4: Call a Professional
If none of these methods work, it may be time to call a professional. A plumber will be able to diagnose the problem and get your disposal working again in no time.
Fixing a jammed sink garbage disposal can be a frustrating experience, but with a few simple steps you can get it working again in no time. Remember to always check the circuit breaker first, and if that doesn’t work, try using a wrench to free up the blades. If all else fails, call a professional for help.
How to Fix Overloaded Disposal
This is another problem why the garbage disposal in your kitchen or bathroom sink may break. Follow these steps to fix an overloaded disposal with your own hands:
Step 1: Identifying the Cause
The first step in tackling a garbage disposal problem is figuring out the root cause. If it’s humming, there’s likely an item stuck in the blades. Conversely, a complete silence could be a sign of a power or motor issue.
Step 2: Extracting Objects
If you hear humming, it’s likely some object is stuck in the blades. To remove it, shut off the power, shine a light inside, and use pliers to grab the object.
Step 3: Restarting
If the disposal is completely quiet, it’s likely to be an electrical or motor-related problem. To reset it, find the reset button on the unit’s bottom and press it until the reset completes.
Step 4: Testing
Once you’ve reset the disposal, it’s time to test it. Turn on the power, run cold water, and wait for the food waste to be broken down.
Conclusion
Fixing a garbage disposal isn’t complicated. By following a few steps—identifying the issue, removing objects, resetting, and testing—you can get it working in no time.
Fixing Worn Out Motor
If you know how to work with tools, are able to change the socket yourself, etc., it will not be very difficult to change the ruined motor. Follow these steps to fix the worn out motor of gabbage disposal with your own hands:
Step 1: Tools and Materials
Before you begin, make sure you have the right tools and materials. You’ll need a screwdriver, a wrench, a new motor, and a few other items. Make sure you have all the necessary items before you start the project.
Step 2: Removing the Old Motor
The first step is to remove the old motor. Start by turning off the power to the disposal. Then, use a screwdriver to remove the screws that hold the motor in place. Once the screws are removed, you can carefully pull the motor out of the disposal.
Step 3: Installing the New Motor
Once the old motor is removed, you can install the new one. Start by connecting the wires to the new motor. Make sure the connections are secure. Then, place the motor in the disposal and use the screws to secure it in place.
Step 4: Testing the Motor
Once the motor is installed, you can test it to make sure it’s working properly. Turn the power back on and turn on the disposal. If the motor is working correctly, the disposal should start running. If it doesn’t, you may need to check the connections or replace the motor.
Conclusion
Replacing the motor in a sink garbage disposal is a relatively simple DIY project. With the right tools and materials, you can replace the motor in a few hours. Just make sure you turn off the power before you start and test the motor after you’ve finished to make sure it’s working properly.
DIY Fixing Method for Loose Wiring of Electric Sink Garbage Disposal
If you’ve ever experienced the frustration of a loose wiring connection in your electric sink garbage disposal, you know how important it is to get it fixed quickly. Fortunately, there are a few DIY methods you can use to get the job done.
Step 1: Tools Needed
Before you begin, make sure you have the right tools for the job. You’ll need a flathead screwdriver, a pair of pliers, and a wire stripper.
Step 2: Disconnect the Power
The first step is to disconnect the power to the garbage disposal. This is an important safety precaution, so make sure you do it before you begin.
Step 3: Locate the Loose Wiring
Once the power is disconnected, you can begin to locate the loose wiring. Look for any exposed wires or connections that may have come loose.
Step 4: Secure the Wiring
Once you’ve located the loose wiring, it’s time to secure it. Use the flathead screwdriver to tighten any loose screws and the pliers to secure any loose connections.
Step 5: Strip and Connect the Wires
Once the wiring is secure, you’ll need to strip and connect the wires. Use the wire stripper to strip the ends of the wires and then use the pliers to connect them.
Step 6: Test the Connection
Once the wires are connected, it’s time to test the connection. Reconnect the power to the garbage disposal and turn it on. If the connection is secure, the garbage disposal should work properly.
Conclusion
Fixing the loose wiring of an electric sink garbage disposal is a relatively simple task that can be done with a few basic tools. With a little patience and the right tools, you can get the job done quickly and safely.
Repairing Leaking Disposal
There are some simple DIY methods you can use to fix a leaking garbage disposal.
Step 1: Tools Needed
Before you start, you’ll need to gather the necessary tools. You’ll need a pair of pliers, a screwdriver, a flashlight, and a wrench.
Step 2: Check the Gasket
The first thing you’ll want to do is check the gasket. The gasket is the rubber seal that sits between the sink and the garbage disposal. If it’s cracked or worn, it could be the cause of the leak. To replace it, you’ll need to unscrew the screws that hold the gasket in place. Once the screws are removed, you can take out the old gasket and replace it with a new one.
Step 3: Check the Hose
The next thing you’ll want to check is the hose. The hose is the pipe that connects the garbage disposal to the sink. If it’s cracked or worn, it could be the cause of the leak. To replace it, you’ll need to unscrew the screws that hold the hose in place. Once the screws are removed, you can take out the old hose and replace it with a new one.
Step 4: Check the Drain
Finally, you’ll want to check the drain. The drain is the pipe that connects the garbage disposal to the sewer line. If it’s cracked or worn, it could be the cause of the leak. To replace it, you’ll need to unscrew the screws that hold the drain in place. Once the screws are removed, you can take out the old drain and replace it with a new one.
Conclusion
Fixing a leaking garbage disposal can be a simple DIY project. All you need is a few basic tools and some patience. With a little bit of effort, you can have your garbage disposal working like new in no time.
When to Call for Help?
When a garbage disposal stops working, it can be difficult to decide whether to call a professional or attempt repairs on your own. Some fixes are easy enough to do yourself, while others require a professional’s expertise. Knowing when to call for help can save you time and money.
DIY Repairs
If your garbage disposal is making strange noises or not grinding up food properly, try some simple DIY repairs before calling a plumber. First, check to make sure the disposal is plugged in and the circuit breaker is on. Then, try resetting the disposal by pressing the reset button located on the bottom of the unit. If the reset button doesn’t work, use a wrench to manually turn the blades.
When to Contact a Plumber
If the DIY repairs are ineffective, it’s time to call a professional. An experienced plumber can diagnose the issue, determine if the disposal needs to be replaced or repaired, and help you select the right model for your needs. They’ll also inspect the pipes and drains connected to the disposal to make sure there are no blockages or leaks. Doing so can prevent future problems, ultimately saving you money.
Conclusion
Figuring out when it’s appropriate to reach out to a professional for help with a broken garbage disposal can save you time and money in the long run.
DYI or Call Professional
Are you wondering whether to fix your garbage disposal on your own or call a professional? Both options have upsides and downsides, so consider them carefully before you decide.
If you choose to repair the disposal yourself, you’ll save money on labor costs and have the satisfaction of knowing you fixed it. But remember, garbage disposals are complex machines, and you may not have the expertise or tools to do the job right. If you don’t know what you’re doing, you could make the problem worse or even harm yourself.
Calling a professional can be pricey, but it’s usually the safest way to go. A plumber will have the skills and tools needed to diagnose and repair the disposal quickly and safely. They’ll also be able to offer advice to prevent the problem from happening again.
Ultimately, it’s up to you to decide whether to DIY or call a professional. Make sure to weigh the pros and cons of each option before making a decision.